1. Moving layers with the Control key
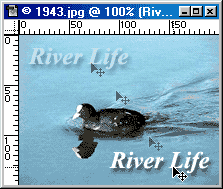
You don't need to activate the Move tool to move layers around. Simply hold down the Control key (for Windows users) or the Command key (Mac users) and click and drag on your layer with the mouse:

2. Hiding the Palettes with the Tab key
Are the palettes getting in the way? You can hide them temporarily just by hitting the Tab key. To bring them back, press the Tab key again.
3. Selecting all pixels on a layer
To select all the opaque pixels on a layer (as opposed to using "Select All", which selects the whole layer), hold down the Control key (Windows) or Command key (Mac), and click on the layer in the Layers Palette:
4. Double-click to open documents
To open a document in Photoshop, you don't need to reach for the File > Open menu option or even press Control+O - you can just double-click on the grey Photoshop window background!
5. Dragging layers between documents
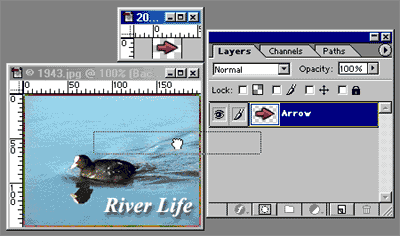
You can copy a layer from one document to another by clicking on it in the Layers palette and dragging it across to the second document window:

6. Use Layer Sets
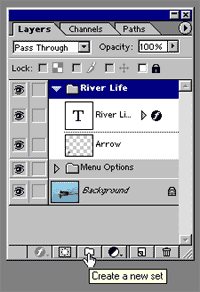
If you're using Photoshop 6 or higher, check out Layer Sets. These let you organize your layers into folders - very useful if you have lots of layers in a document! To create a new Layer Set, click on the folder icon at the bottom of the Layers palette, then drag layers on top of a layer set to add them to the set:

7. Full screen mode
If you're working on a large image such as a photo, you can maximize the available editing area by pressing the F key to toggle between a full screen mode with and without menu bar, and normal editing mode. If you also use tip number 2 above, and the tool shortcut keys, you can do a lot of your work without a menu or palette in sight!
8. Nudging
You can get precise control over the position of your layers by using the arrow keys on the keyboard to nudge the layer around. Hold down the Control key (Windows) or the Command key (Mac) and use the up, down, left and right arrows to move the layer 1 pixel at a time. To move the layer by 10 pixels at a time, hold down the Shift key as well.
9. Choosing colours quickly
Press I to bring up the Eyedropper tool, then click on a colour in your image to make that colour the foreground colour. Press the ALT key and click to make the colour the background colour instead.
You can also press the D key to reset the foreground and background colours to the default (black and white), and the X key to swap the foreground and background colours.
10. Keeping to straight lines
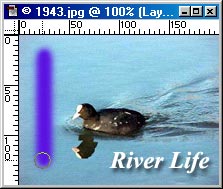
You can often constrain movement of the mouse to the nearest 45-degree or 90-degree angle by holding down the Shift key while you click and drag with the mouse. This works on tools such as the Paintbrush Tool, Line Tool and Move Tool. Great for drawing straight lines!

Tidak ada komentar:
Posting Komentar